
I've had my eye on this pattern for a while, but didn't really have any reason to make a slew of stockings. I loved the reverse applique, however, so now that I finally had an excuse to make them, so here's the final product, followed by a quick run-down on how these came to be.

Reverse Applique Christmas Stockings
pattern slightly modified from Teal and Lime
What I used for this project:
- three different colors of felt (I'll go over amounts in a bit)
- ribbon
- fusible interfacing
- spray adhesive
- sewing machine
- light cardboard (for template)
- sharp scissors
- printer
- sharpies (what project would not involve sharpies?)
To start, you'll want to buy some felt. How much sort of depends on how many stockings and how big you want to make them. Let me preface this by saying that I am terrible at estimating how much fabric I will ever need for anything, and so I tend to err on the side of buying too much, since I've definitely ended up with not enough before...
So for these, I decided I would buy enough felt so that I could make each stocking approximately 12"x18". I wanted to make five stockings, and the felt I was buying was 72" across, so I bought 1 yd. of the grey I used, and 1/2 yd. of the cream. Remember, you need two layers of the "outer" color, but you only need half as much of the "inside" color. For the red cuffs, I ended up buying 3 of the paper-sized sheets of that color, but I only ended up using 2 of them. (Disclaimer: I had tons of everything left over.)
The reason I had so much left over became obvious when I started cutting out the pattern. I decided to make a template out of an empty cereal box so that I could just trace and cut. When I was planning how much fabric to buy, I didn't take into account how closely you could lay the patterns next to each other to maximize space.
 |
| See? I'm notoriously bad at predicting fabric amounts. |
One other thing you might notice from that picture is that I had the toe of the stocking on the left, but traced them the other way so that the sharpie is on the inside.
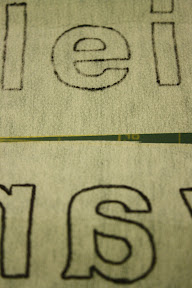
Once you've cut out all your pieces, you'll want to get your interfacing and put the names on the stockings. Decide on a font, and you'll probably need to test out sizes and layouts to find the one you like. I ended up using Helvetica size 175, and increasing the spacing between letters to 15pt. Print them out, and trace them on the interfacing.
Since I didn't have interfacing that is fusible on both sides (and was too lazy to go buy some) this is the source of most of my edits to this pattern. I put each name on a little rectangle of interfacing, instead of a whole stocking shape.
|
|

At this point, iron the interfacing pieces onto the wrong side of the front stocking piece, and cut out all the letters, making sure to set aside the insides of any letters with floating pieces (like b's, d's, etc...). Once that was done, I decided to attach the ribbon to the front piece so that the seams for it wouldn't be visible.

Then I cut out and attached the red cuffs at the top. I made my cuffs about 3.5" tall, but that might change depending on the size of your stocking. Pin your cuffs to the outer piece, and top-stitch all around the cuff.

Then, to attach the contrast backing that will show through the letters, I went ahead and used spray adhesive. Probably not the most ideal, but it definitely worked, and saved me the trouble of driving out just to get a bunch of double-sided fusible interfacing. Just be careful putting down the floating pieces, I don't know how easy it would be to move them after the initial positioning.
The last step (after letting the adhesive dry) is to pin the back piece and top-stitch the whole thing together. Be sure not to stitch across the top this time! I figure it's just a good reminder, although it should go without saying that we would like to be able to fill the stockings. So there you have it! Reverse applique stockings that look fantastic, but are actually not that much work to make!

No comments:
Post a Comment